Why every restaurant needs an online ordering system: How to get started
Don't pay hefty commission fees to Uber Eats or Just Eat! Instead, learn how to create an online restaurant ordering system with WordPress.
In the wake of the COVID-19 pandemic, many restaurants were forced to close their doors or switch to delivery and takeout orders only. This led to a surge in demand for online ordering systems, which allowed restaurants to continue to serve their customers while maintaining social distancing and other safety protocols. However, even as the pandemic comes to an end, the benefits of an online restaurant ordering system remain clear.
In this article, we'll explore why every restaurant should have an online ordering system and how to get started. From expanding your customer base to streamlining your operations, an online ordering system can help take your restaurant business to the next level. So, whether you're a small mom-and-pop eatery or a large restaurant chain, read on to discover how an online ordering system can benefit your business and how to implement one today.
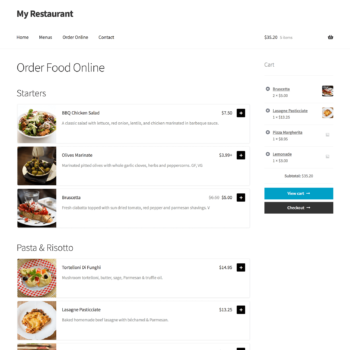
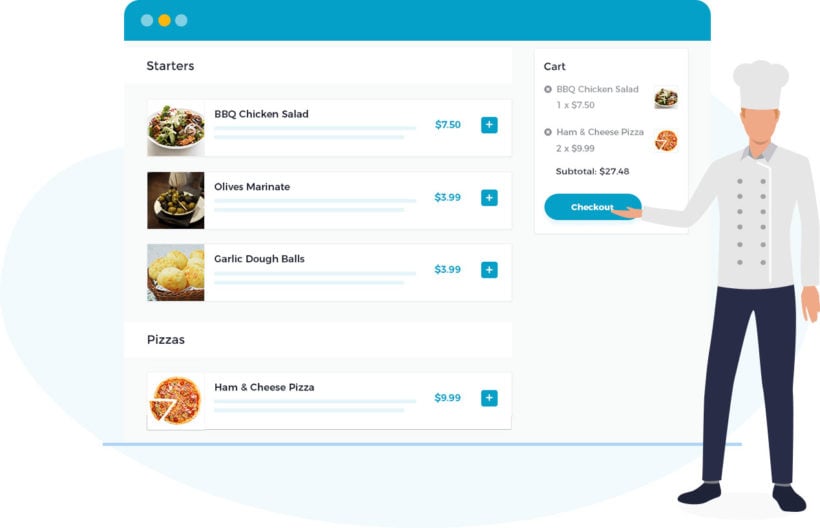
It will look something like this:

We'll do it using WordPress, the world's leading open source content management system. This gives you full control over your food ordering system. Don't worry if you have never set up a website before. You don't need any technical know-how - I'll provide step-by-step written instructions, plus a video tutorial where you can watch me setting it all up.
What you'll need to set up restaurant online ordering
We'll build the online takeaway ordering system with some of the best tools available:
- WordPress (free) The world's leading content management system. This gives you full control over the content of your website. You can create pages, add images and more - all without writing a single line of code.
- WooCommerce (free) The world's most popular e-commerce platform. Adding WooCommerce converts your WordPress site into a fully featured restaurant e-commerce website. You can add products, set delivery areas and costs, take payment online, and more.
- Kinsta (paid) All websites need to be made available on the website. Kinsta is our recommended web hosting company, and will keep your website online and running smoothly. (If you'd rather choose your own hosting company, that's fine - everything in this tutorial works with any web host.)
- WooCommerce Restaurant Ordering (paid) An online restaurant ordering system works best when your menu is listed in a quick one-page food order form. You need the WooCommerce Restaurant Ordering plugin for that.
Why WordPress?

There are many reasons why WordPress - used alongside the plugins I've mentioned - is the best restaurant online ordering platform:
- Save money - If you use a hosted third party takeaway ordering system such as Uber Eats and Just Eat, you're charged a hefty percentage in commission from EVERY food oder. This adds up to many thousands of dollars before long. By hosting your own WordPress food delivery website, you pay a small amount in hosting and software costs. However, this is far less than hosted solutions, and the base software remains free forever.
- You're in control - Unlike Uber Eats and Just Eat, you own your restaurant ordering platform. The solution described in this tutorial is an open source food ordering system, making it flexible and future-proof. You can tailor the design to suit your restaurant's branding, and you own your data - forever.
- Fully featured - As the world's leading e-commerce platform, WooCommerce comes pre-built with nearly everything you need including online payment (either by PayPal, credit card, or cash on delivery), stock management, sales taxes, delivery costs, and more. If that's not enough, there are literally thousands of plugins available to add extra features.
- Beginner-friendly - Creating an online ordering system for restaurants sounds scary, but it's really not! All the tools in this tutorial are ideal for beginners.
As you can see, it's the perfect way to set up electronic ordering for any restaurant. Next, I'll tell you how to create an online food ordering system.
Can I add food ordering to my existing restaurant website?
If you already have a WordPress restaurant website and simply want to add a food ordering system, that's fine. Just install the free WooCommerce plugin via Plugins → Add New and skip straight to section 2.
If your main website doesn't run on WordPress, then you need to set up a WordPress site for the food ordering system. You can easily link the two sites together so that customers can move between them. Or even better, switch your entire restaurant website to WordPress!
1. Set up web hosting and install WordPress
First, you need to create the basic website on a hosting account.
If you don't already have web hosting sorted out, then I highly recommend Kinsta. They're a managed WordPress host that makes it incredibly easy to create and maintain your restaurant website. Your food ordering system will be secure and quick to load - essential when you're selling online.
If you wish to use a different hosting company for your restaurant website, that's fine. Just use their documentation to create the basic website and install the free WordPress and WooCommerce plugins.
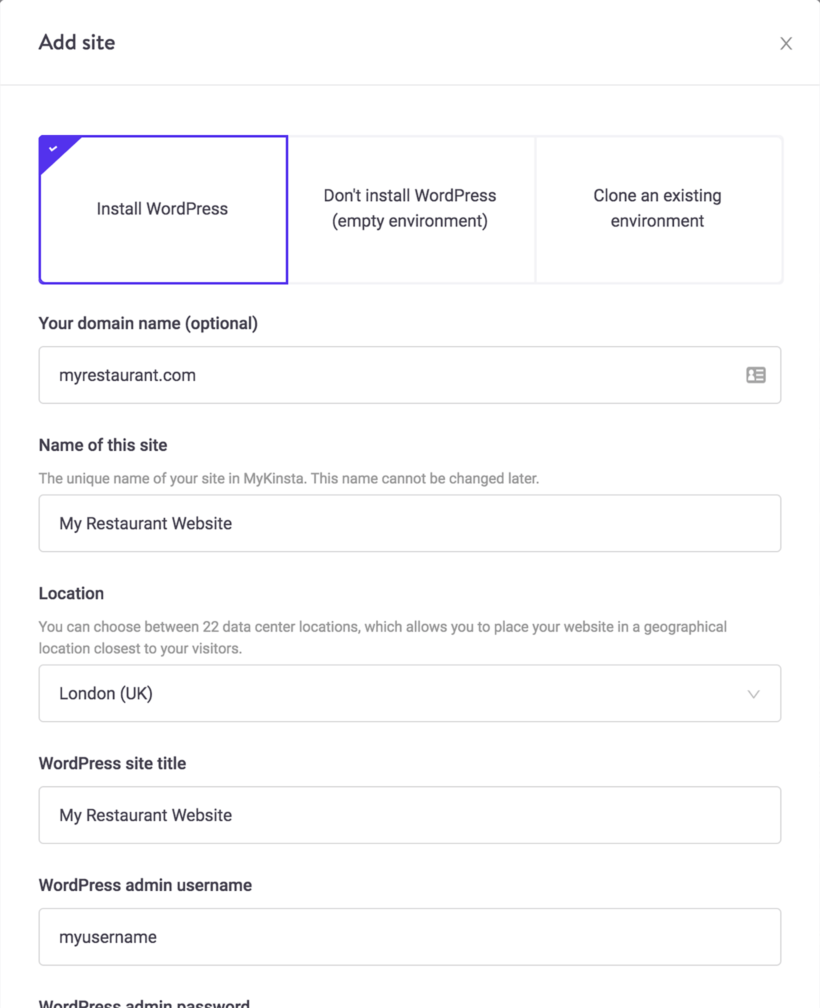
In your Kinsta account, click the 'Add site' button and fill in the information as required:
- First, select 'Install WordPress'.
- Enter the domain name that you plan to use for the website. If you haven't chosen one yet, just leave this blank. You can set up your restaurant ordering website with Kinsta's temporary domain name, and I'll tell you how to get a permanent website address in section 7.
- Name of this site - this will appear in your list of sites on Kinsta.
- Location - choose a location close to you. Your website will load fastest for visitors near to this.
- WordPress site title - this will appear in the top right corner of your website (unless you choose to upload an image logo).
- WordPress admin username, password and email - choose the information that you will use to log into the WordPress Dashboard where you will edit your restaurant website.
- Finally, tick the boxes to install WooCommerce and Yoast SEO, but not multisite.
After that, wait a few minutes for the site to finish completing. You can then click on the 'Domains' tab in Kinsta and click on the link to the WordPress Dashboard.
Now your basic website is set up, and it's time to add the automated restaurant ordering system!
Read on, or watch this video to see how to set everything up.
2. Add e-commerce to your restaurant website
Next, it's time to set up WooCommerce. This is the e-commerce part of your online restaurant ordering system and provides the shopping cart features. For example, the ability to add each item on your food menu as products; take payment online; and charge for shipping and tax.
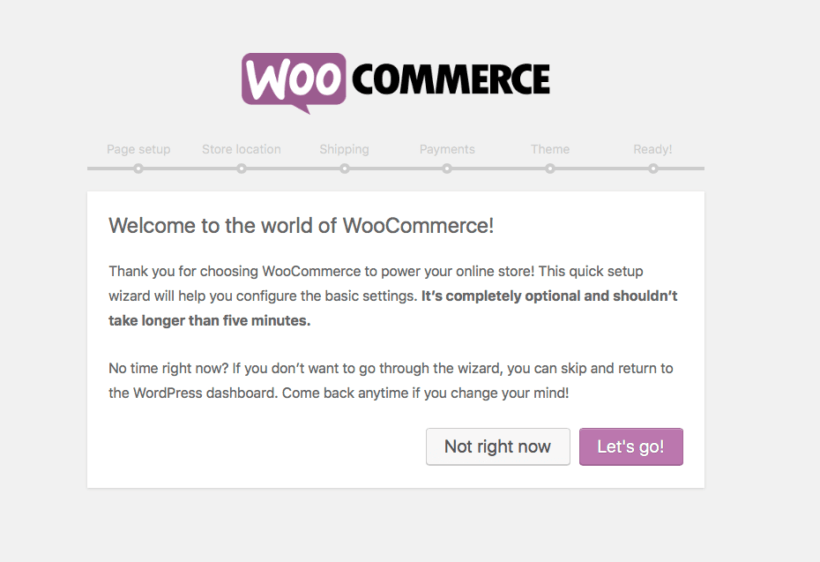
Click on the 'Plugins' link on the left hand side of the WordPress admin. Find the 'WooCommerce' plugin and click 'Activate'.
Next, you'll be taken into the WooCommerce Setup Wizard. Follow the onscreen instructions to set up the essential parts of your e-commerce facility. Here are some tips on which settings to choose for an online restaurant ordering system?
-
- Storefront or Delicio theme - a WordPress theme controls the design and styling of your website, i.e. how it looks. You can use any WordPress theme that supports WooCommerce. If you want to get up and running as quickly as possible and will be happy with a clean, modern and simple design, then I recommend ticking the box to install the Storefront theme. This free WordPress theme is easy to use and will keep your food ordering website lightweight and easy to maintain. Alternatively, the Delicio restaurant theme is purpose-built for restaurants and designed to work with WooCommerce Restaurant Ordering (view demo).
- Payment methods - as a minimum, I recommend PayPal. Simply enter the email address you use to log into PayPal, and you can take payments online! If you want to take credit card payments without PayPal, then set up a Stripe account and enable the Stripe payment option. For takeaway food ordering, you might also want to enable the 'Cash on delivery' option.
- Shipping options - if you'll be charging for shipping, then enable the Flat Rate shipping and add a shipping cost. Don't spend too long on this, because we'll configure this in more detail in step 6, below.
Once you're finished, click the button to return to the WordPress Dashboard.
3. Add your food menu
The next step is to each food from your paper menu as a WooCommerce product. We'll do this in 2 stages:
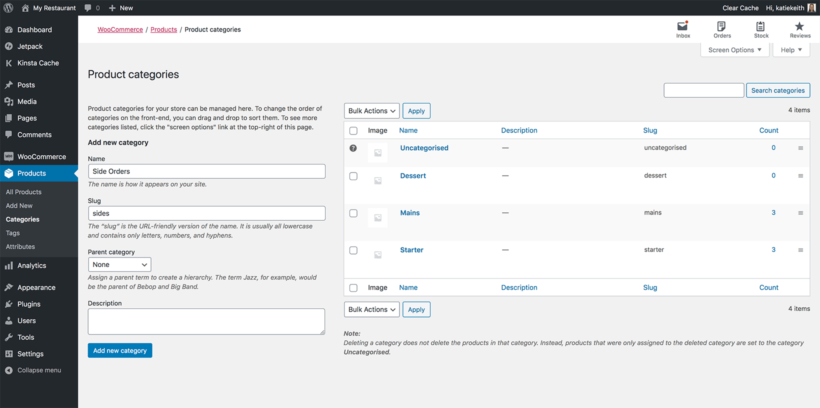
3a. Create categories for your online restaurant menu
You can list the foods in each category separately on your food order form. Most restaurants create a category for each section of their paper menu, for example Starters, Main Courses, Desserts, Kids, Side Dishes, Drinks, etc.
Go to Products → Categories and create as many categories as you like.
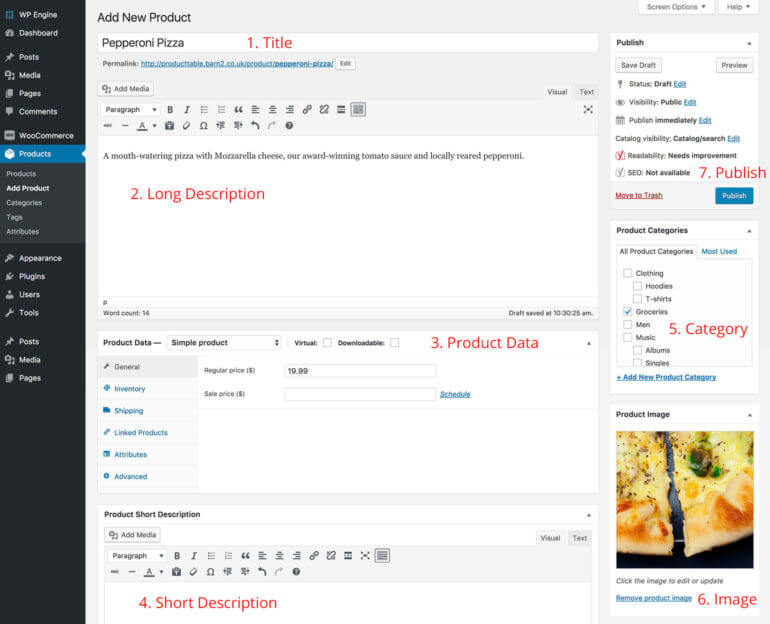
3b. Add your foods as WooCommerce products
Next, it's time to add each food as a product. Go to Products → Add New and complete the information on the Add New Product screen:
Some tips:
- Keep it as simple as possible. The title and price are compulsory, and everything else is optional. I also recommend selecting a category so that you can structure your restaurant ordering system logically. You can add an image, short and long description if you wish to display these in your online food order form.
- You can the product description fields to record useful information about your foods. This is useful for displaying health or dietary information such as 'Gluten Free', 'Healthy', 'Dairy Free', 'Contains Nuts', 'Vegan' or 'Vegetarian'.
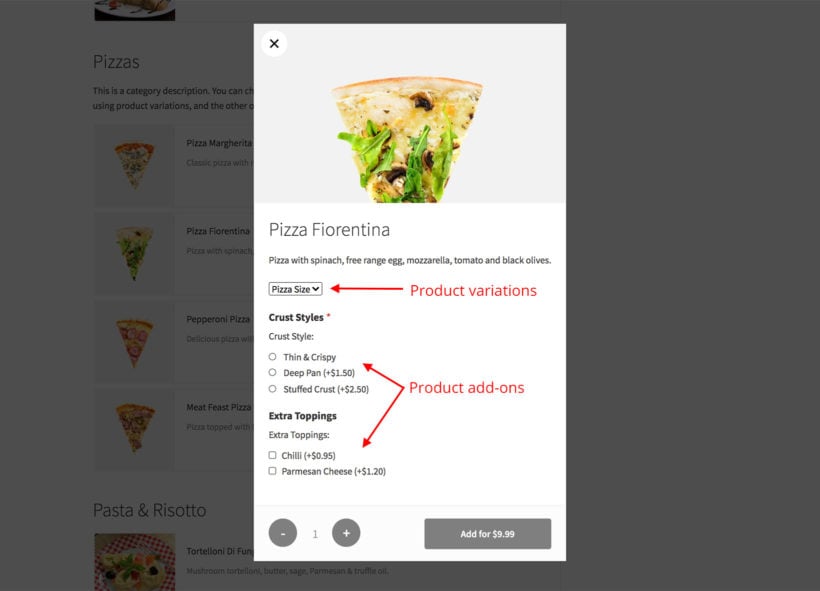
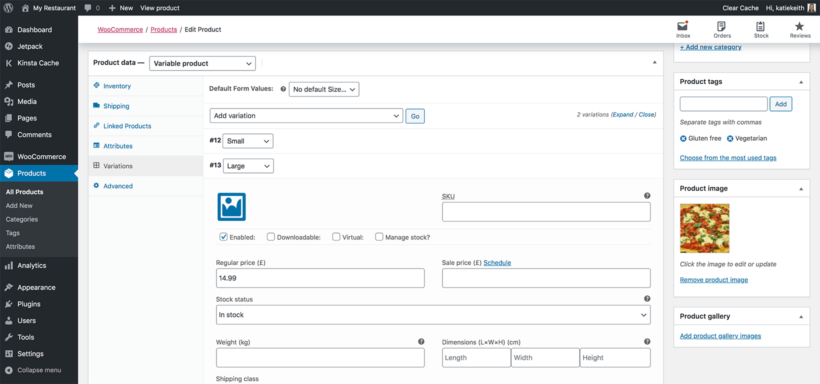
- If you offer a choice of options for a dish - for example, small and large options for a pizza - then you can do this with product variations:
- Instead of 'Simple product' (the default), select 'Variable product' from the dropdown at the top of the 'Product Data' section.
- Now click onto the 'Variations' tab. Open the 'Add variation' dropdown, select 'Create variations from all attributes', and click Ok (ignore the warning that appears). This will create a variation for each combination of attributes that you created in the previous step.
- Open up each variation and add a price.
- Variations appear in a lightbox when someone clicks on a food item in the online food order form. If you'd rather set a base price for each dish and let customers select one or more extras, then you should add these with the Product Options plugin instead. This lets you add checkboxes to your food order form. For example, if you offer extra sauces or pizza toppings then customers can tick as many as they like. Each option will add to the price of the pizza.
Repeat the process until you've finished adding all your foods as products.
4. Create a food ordering page with WooCommerce Restaurant Ordering
Now comes the exciting bit! It's time to see your online restaurant ordering system come to life on the front end of your food delivery website. We'll need the WooCommerce Restaurant Ordering plugin for that, so get it now:
4a. Set up WooCommerce Restaurant Ordering
When you buy WooCommerce Restaurant Ordering, you'll receive an email containing a download link and license key.
- Download the zip file, then go to Plugins → Add New in the WordPress admin.
- Upload the WooCommerce Restaurant Ordering zip file and activate it.
- Click on the 'Settings' link next to the WooCommerce Restaurant Ordering plugin in your list of plugins.
- Enter your license key and activate it.
- Now go through the WooCommerce Restaurant Ordering settings and configure your food order forms. You can set it up however you like, including choosing the number of columns and the information to include. Also add your restaurant opening hours. That way, people will only be able to order while you're open.
- When you've finished, save your changes.
4b. View your restaurant ordering page
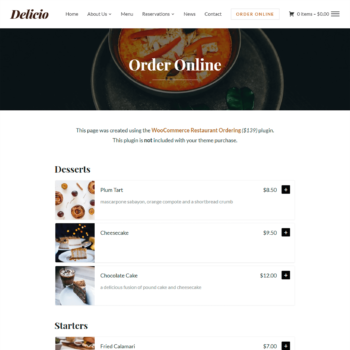
Now click on the 'Pages' link on the left of the WordPress admin, and find a new page called 'Restaurant Ordering'. (You can rename it to anything you like.)
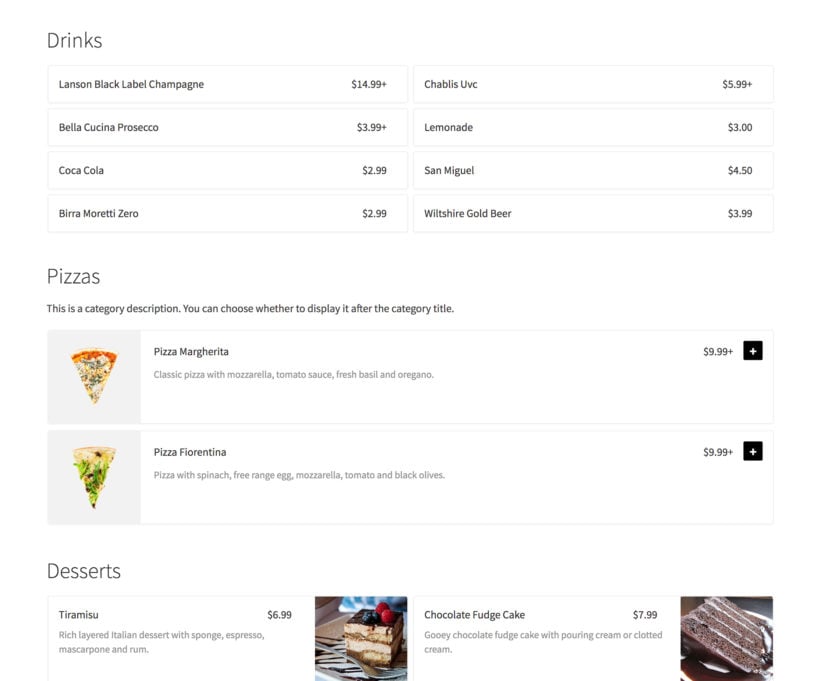
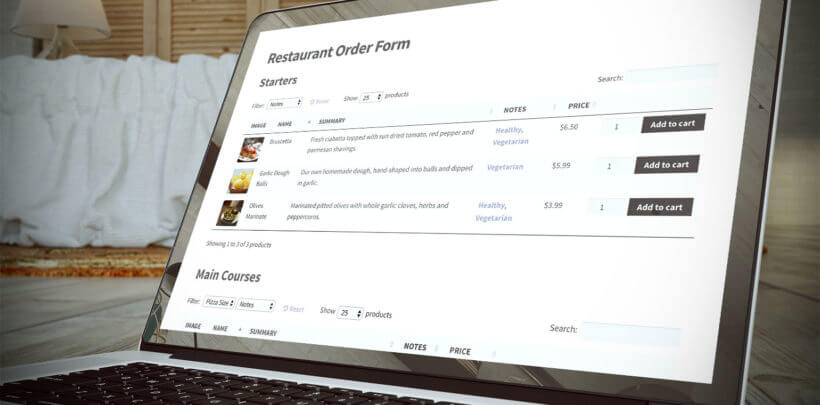
View the page, and you will see a beautiful list of your food menu, divided by category:

The exact styling depends on your WordPress theme, so the food order forms will fit perfectly with the rest of your site.
The WooCommerce Restaurant Ordering plugin also comes with a shortcode that you can use to list specific categories in different locations on your site. That way, each order form can be different if you want it to be!
4c. Structure your restaurant website
Now you've finished creating the food order form, it's time to incorporate it into the overall structure of the website. This helps customers to find it easily. There are two ways to do this:
- Set it as the homepage - In the WordPress admin, go to Settings → Reading and select the food ordering page as the homepage.
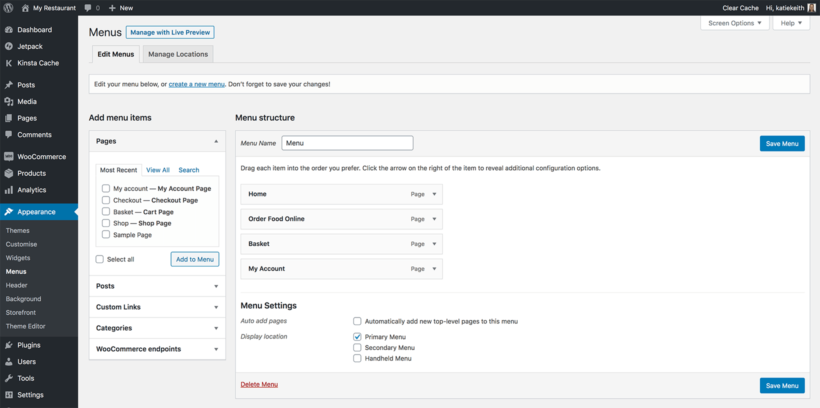
- Add it to the website menu - If you don't want to use the food ordering page as your homepage, that's fine. Instead, go to Appearance → Menus and create a navigation menu for your website. Add all the pages that you wish to appear in the menu, such as the food order form, cart, and any other pages you've created. Tick the appropriate box at the bottom of the page to set it as your primary menu. These links will appear across the top of the screen, so that visitors can find their way around easily.
5. Set up shipping zones and restaurant delivery areas
When we did the WooCommerce Setup Wizard earlier, we added some basic shipping settings. Let's build on these next, so that people can only order food for delivery within the correct area.
If you just deliver to a single area, and will charge the same delivery cost to each one, then you only need one shipping zone. If you want to change the delivery cost depending on the area, then you need multiple shipping zones.
- Go to WooCommerce → Settings → Shipping.
- Click 'Add Shipping Zone'.
- Add a 'Zone Name' and select your country under 'Zone regions', then click the 'Limit to specific ZIP/postcodes'.
- Now enter the postcodes or zip codes for this delivery area.
- Next, click 'Add shipping method' and add one or more delivery options for this zone. These will appear on the checkout page. The choices are:
- Flat rate - Charge a fixed delivery fee for each order,
- Free shipping - Offer free shipping. If you like, then you can set a minimum order value before free shipping becomes available.
- Local pickup - Allow customers to collect their food order from your restaurant.
- Repeat these steps for each shipping zone.
Tip: As well as restricting the shipping area on the checkout page, avoid disappointing your users by clearly stating your delivery area elsewhere on the site. For example, mention it on the food ordering page.
6. Get a restaurant website address
Now, your restaurant ordering website is complete! The final step is to give it a proper website address/domain name, for example myrestaurant.com.
If you don't already own a domain name, then you can buy one from any domain name registrar, for example Namecheap or 123-Reg. Once you've done that, you can link to your website to your domain name as follows:
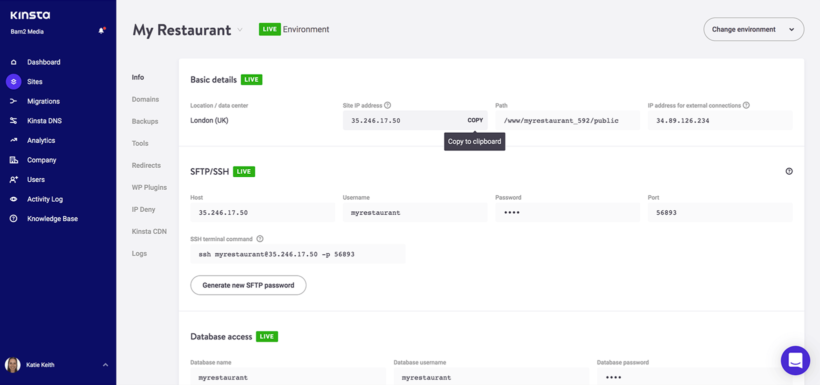
- Log into your web hosting account (e.g. at Kinsta), and find the IP address for your website. In Kinsta, this is on the 'Info' tab - hover over 'Site IP address' and click 'Copy'.
- Now log into your domain name registrar, and find the Advanced DNS settings.
- Find the root A record (either indicated by a blank, an @ or *) and set it to the IP address where your website is located.

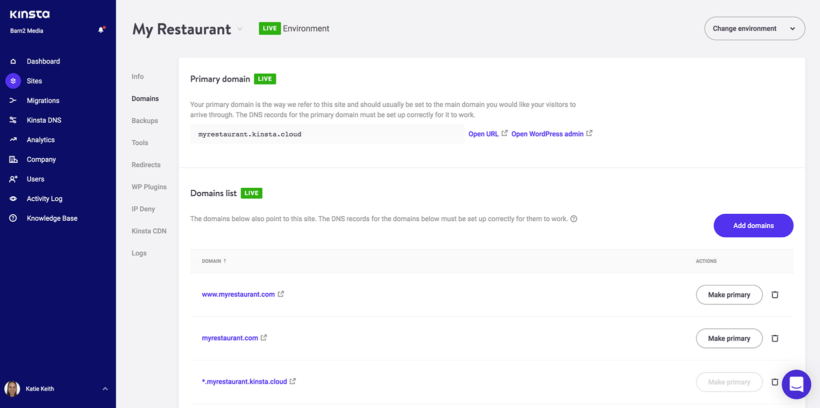
- Back in your web hosting account (e.g. Kinsta), add the domain. The exact process depends on your host, and in Kinsta this is on the 'Domains' tab. Add the www and non-www versions of the domain.
- Finally, wait a few hours and your website will go live on the domain! If you can get any problems, ask your web host for help.
7. Add a popup cart
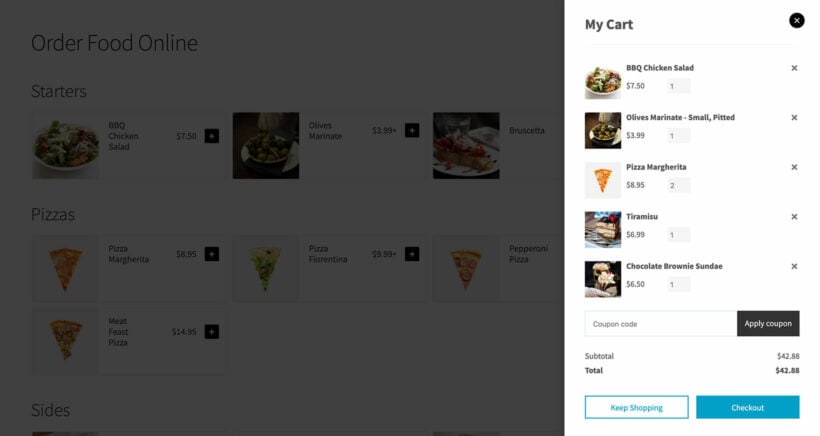
Restaurant customers expect to be able to place their orders really quickly, ideally from a single page. You can achieve this by using WooCommerce Restaurant Ordering alongside the WooCommerce Fast Cart plugin. It adds a popup cart and checkout to your food ordering page, making it quick and easy to complete the order.
8. Add delivery/collection times (optional)
All automated restaurant ordering systems need to manage their customers' expectations around delivery timescales. If you just want customers to receive their food orders as soon as they're ready, then you can ignore this step. Or if you'd like customers to be able to choose an exact delivery or time slot, then install the WooCommerce Delivery Slots plugin.
As well as adding delivery slots that reflect the way you structure your deliveries, you can set a maximum number of deliveries per slot. This helps to manage kitchen capacity by adding a limit of the number of orders per time slot.
9. Launch your finished food ordering website
Finally, it's time to go live and start taking food orders online. Follow the steps in our go-live checklist, and start promoting your new restaurant online system to the public!
When you receive an order, you'll receive an email so that you can start preparing the food and get it to the delivery driver. If you want to automate this, there are various WooCommerce SMS notification and WooCommerce cloud printing plugins that you can use to automatically send new food orders to the kitchen.
Create your own restaurant ordering system
As you can see, it's surprisingly easy to create a restaurant ordering system. By building your own food ordering website, you get full control and ownership - and it costs a fraction of the price of third party platforms such as Uber Eats.
To get started, you'll need:
- WordPress as the overall platform for your website.
- WooCommerce for the e-commerce features.
- Kinsta to host your website.
- WooCommerce Restaurant Ordering for the one-page food order form.
Follow the steps in this tutorial to set everything up, and start accepting online food delivery orders today.
10 Comments
Hi Katie,
I have read the blog and the information is really helpful for restaurant owners who are new as well as looking to expand their business. We provide an online ordering system for free to restaurants and takeaways.
Hey James. Thanks for your comment. We're glad to hear that you find this guide helpful. Let me know if you have more questions/concerns. You may also reach us via our dedicated Support Center. Cheers!